Setting Up NeoVim as a PHP IDE: A LazyVim-Based Guide for 2026
NeoVim with LazyVim gives PHP developers a fast, keyboard-driven IDE with LSP support, testing integration, and Blade syntax highlighting. Here's how to set it up from scratch.
If you’ve ever watched a colleague fly through code in NeoVim and thought “that looks fast but I’d never figure out the config,” the barrier to entry has dropped significantly. LazyVim — a NeoVim distribution that ships with sensible defaults and a plugin manager — gives you a fully functional IDE experience within minutes, with PHP-specific extras that rival PhpStorm’s feature set. Here’s how to set it up for serious PHP development in 2026.
Why NeoVim for PHP?
The practical case comes down to three things: speed, resource usage, and keyboard-driven workflow. NeoVim launches in milliseconds, uses a fraction of the memory PhpStorm requires, and once your muscle memory develops, you can navigate and refactor code without your hands leaving the keyboard.
That said, NeoVim isn’t trying to replace PhpStorm for everyone. If you’re happy with JetBrains and your machine handles it well, there’s no reason to switch. But if you work on remote servers, run multiple projects simultaneously, or simply prefer terminal-based workflows, NeoVim with modern tooling is remarkably capable.
Prerequisites
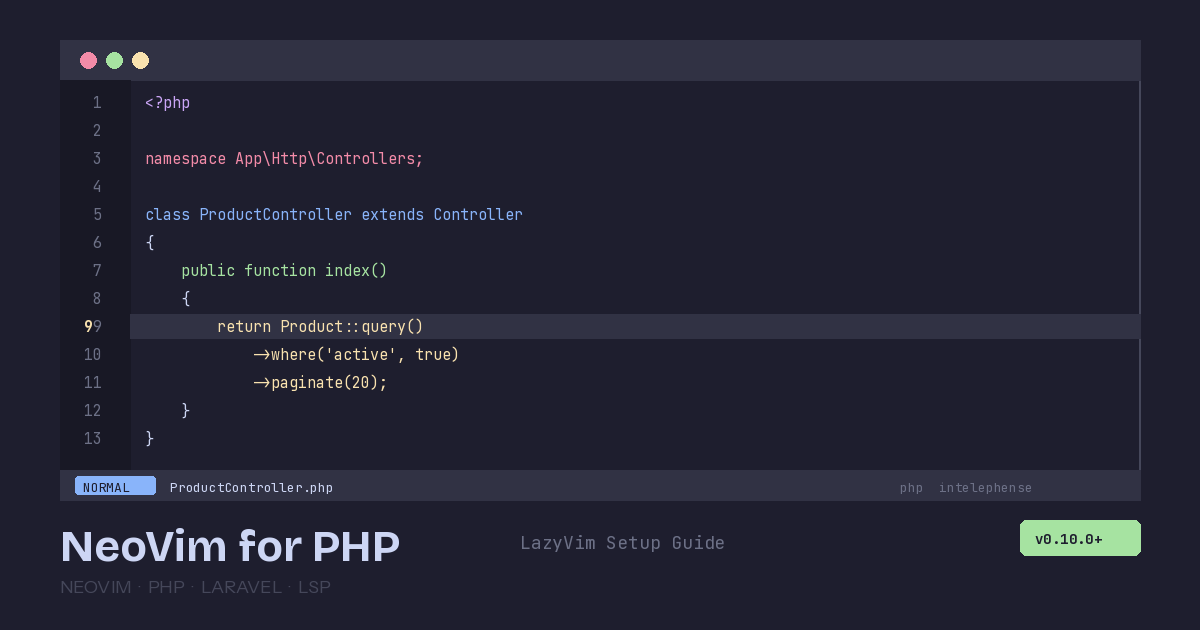
You’ll need NeoVim 0.10.0 or later. Check your version:
nvim --versionOn macOS with Homebrew:
brew install neovimOn Ubuntu/Debian:
# The apt version is often outdated — use the official PPA or AppImage
curl -LO https://github.com/neovim/neovim/releases/latest/download/nvim-linux-x86_64.appimage
chmod u+x nvim-linux-x86_64.appimage
sudo mv nvim-linux-x86_64.appimage /usr/local/bin/nvim
Installing LazyVim
Back up any existing NeoVim config, then clone the LazyVim starter:
# Backup existing config
mv ~/.config/nvim ~/.config/nvim.bak
mv ~/.local/share/nvim ~/.local/share/nvim.bak

# Clone LazyVim starter
git clone https://github.com/LazyVim/starter ~/.config/nvim

# Remove the .git folder so you can track your own changes
rm -rf ~/.config/nvim/.git
Open NeoVim and LazyVim will bootstrap itself, installing all core plugins automatically:
nvimGive it a minute on first launch. Once it settles, press x to open the Extras menu, search for PHP with /php, and press x to toggle the PHP extras on. Restart NeoVim and the PHP-specific tooling will install.
Configuring the PHP Language Server
LazyVim’s PHP extras install Intelephense by default, which is the strongest PHP language server available. For basic features — autocompletion, go-to-definition, hover documentation, and diagnostics — the free tier works well. The premium license (a one-time purchase) unlocks additional features like rename refactoring, code actions, and implementation finding.
If you prefer the open-source Phpactor instead, create a config file:
-- ~/.config/nvim/lua/plugins/php.lua
return {
  {
    "neovim/nvim-lspconfig",
    opts = {
      servers = {
        intelephense = {
          -- Or switch to phpactor:
          -- phpactor = {},
          settings = {
            intelephense = {
              files = {
                maxSize = 5000000,
              },
              environment = {
                phpVersion = "8.4",
              },
            },
          },
        },
      },
    },
  },
}
Making Laravel Magic Work
If you’re working with Laravel, the framework’s heavy use of facades, magic methods, and dynamic properties can confuse language servers. Install Laravel IDE Helper to generate stub files that make Intelephense (or Phpactor) understand Laravel’s patterns:
composer require --dev barryvdh/laravel-ide-helper

# Generate helper files
php artisan ide-helper:generate
php artisan ide-helper:models --nowrite
php artisan ide-helper:meta
Add these commands to your composer.json scripts so the stubs regenerate automatically:
{
    "scripts": {
        "post-update-cmd": [
            "@php artisan ide-helper:generate",
            "@php artisan ide-helper:models --nowrite",
            "@php artisan ide-helper:meta"
        ]
    }
}
With the stubs in place, you’ll get accurate autocompletion on facades like Cache::get(), Route::middleware(), and Eloquent model properties.
Blade Template Support
Blade syntax highlighting requires a dedicated Treesitter parser. Add it to your config:
-- ~/.config/nvim/lua/plugins/treesitter.lua
return {
  {
    "nvim-treesitter/nvim-treesitter",
    opts = {
      ensure_installed = {
        "php",
        "php_only",
        "blade",
        "html",
        "css",
        "javascript",
      },
    },
  },
}
The blade parser handles Blade directives like @if, @foreach, and @livewire. The php_only parser enables proper PHP injection inside Blade templates so you get autocompletion and diagnostics within {{ }} expressions and @php blocks.
For Alpine.js attributes in Livewire components, the JavaScript parser handles x-data, x-on, and x-bind attribute values with proper syntax highlighting.
Testing Integration With Neotest
Running tests without leaving your editor is one of the biggest productivity gains. Install neotest with the Pest adapter (which also supports PHPUnit):
-- ~/.config/nvim/lua/plugins/test.lua
return {
  {
    "nvim-neotest/neotest",
    dependencies = {
      "V13Axel/neotest-pest",
    },
    opts = {
      adapters = {
        ["neotest-pest"] = {},
      },
    },
  },
}
Now you can run tests with these keybindings:
<leader>tr— run the nearest test to your cursor<leader>tt— run all tests in the current file<leader>tT— run the entire test suite<leader>to— show test output in a floating window<leader>ts— toggle the test summary panel
The test output appears in a split panel, and failing tests are highlighted inline with diagnostic markers. You can jump between failures with standard diagnostic keybindings (]d and [d).
Laravel-Specific Plugins
Two plugins make Laravel development significantly smoother:
laravel.nvim
This plugin gives you quick access to Artisan commands and route inspection:
-- Add to ~/.config/nvim/lua/plugins/laravel.lua
return {
  {
    "adalessa/laravel.nvim",
    dependencies = {
      "nvim-telescope/telescope.nvim",
    },
    cmd = { "Laravel" },
    keys = {
      { "<leader>la", ":Laravel artisan<cr>", desc = "Artisan" },
      { "<leader>lr", ":Laravel routes<cr>", desc = "Routes" },
      { "<leader>lm", ":Laravel related<cr>", desc = "Related Files" },
    },
    config = true,
  },
}
<leader>la opens a fuzzy finder over all Artisan commands. <leader>lr lists all routes with their controllers. <leader>lm finds related files — from a controller, jump to its model, migration, tests, or form requests.
blade-nav.nvim
This plugin lets you press gf (go to file) on Blade component references and view includes to jump directly to the file:
return {
  {
    "RicardoRamirezR/blade-nav.nvim",
    ft = { "blade" },
    dependencies = { "hrsh7th/nvim-cmp" },
    config = true,
  },
}
With this installed, placing your cursor on <x-alert /> and pressing gf jumps straight to resources/views/components/alert.blade.php.
Essential Keybindings to Learn First
LazyVim uses <Space> as the leader key. Press it and wait — a popup (via which-key.nvim) shows all available commands. Here are the ones you’ll use constantly:
<leader>ff— find files by name (fuzzy search)<leader>sg— search (grep) across all filesgd— go to definitiongr— find all referencesK— hover documentation<leader>ca— code actions (quick fixes, refactors)<leader>cr— rename symbolctrl+o— jump back to previous location<leader>gg— open LazyGit (terminal UI for git)<leader>cm— open Mason to install/manage LSP servers and formatters
The which-key popup is your safety net while learning. You don’t need to memorize everything upfront — press <leader> and explore.
Formatting With Laravel Pint
If you’re using Laravel Pint (or PHP-CS-Fixer), install it through Mason (<leader>cm, search for “pint”) and LazyVim will format on save automatically. You can also trigger manual formatting with <leader>cf.
For Pint specifically, make sure your project has a pint.json configuration file. NeoVim’s formatter will pick it up automatically and apply your team’s coding standards.
Is It Worth the Switch?
The honest answer: there’s a learning curve. Budget a week of slower-than-normal work while your muscle memory develops. After that, most developers report being at least as fast as they were in their previous editor, and significantly faster for navigation-heavy tasks like code review, refactoring, and debugging.
The real payoff is that NeoVim’s keybindings transfer everywhere. Once you learn them, you can install IdeaVim in PhpStorm, Vim mode in VS Code, or use them in any terminal on any server. It’s an investment in a universal skill, not a vendor-specific one.
Start with LazyVim’s defaults, add the PHP extras, and resist the urge to customize everything on day one. Use it for real work, notice what’s missing, and add plugins one at a time. That’s how you build a setup that actually fits your workflow.
Sources:
- NeoVim for PHP and Laravel — Sean Kegel
- LazyVim Documentation — LazyVim
- Jess Archer’s Laracasts Course: Neovim as a PHP and JavaScript IDE — Laracasts